Planning a Custom Shipping Container Build Step by Step
Plan a shipping container custom build step by step, from permits and container size to drawings, site prep, delivery, and inspection.
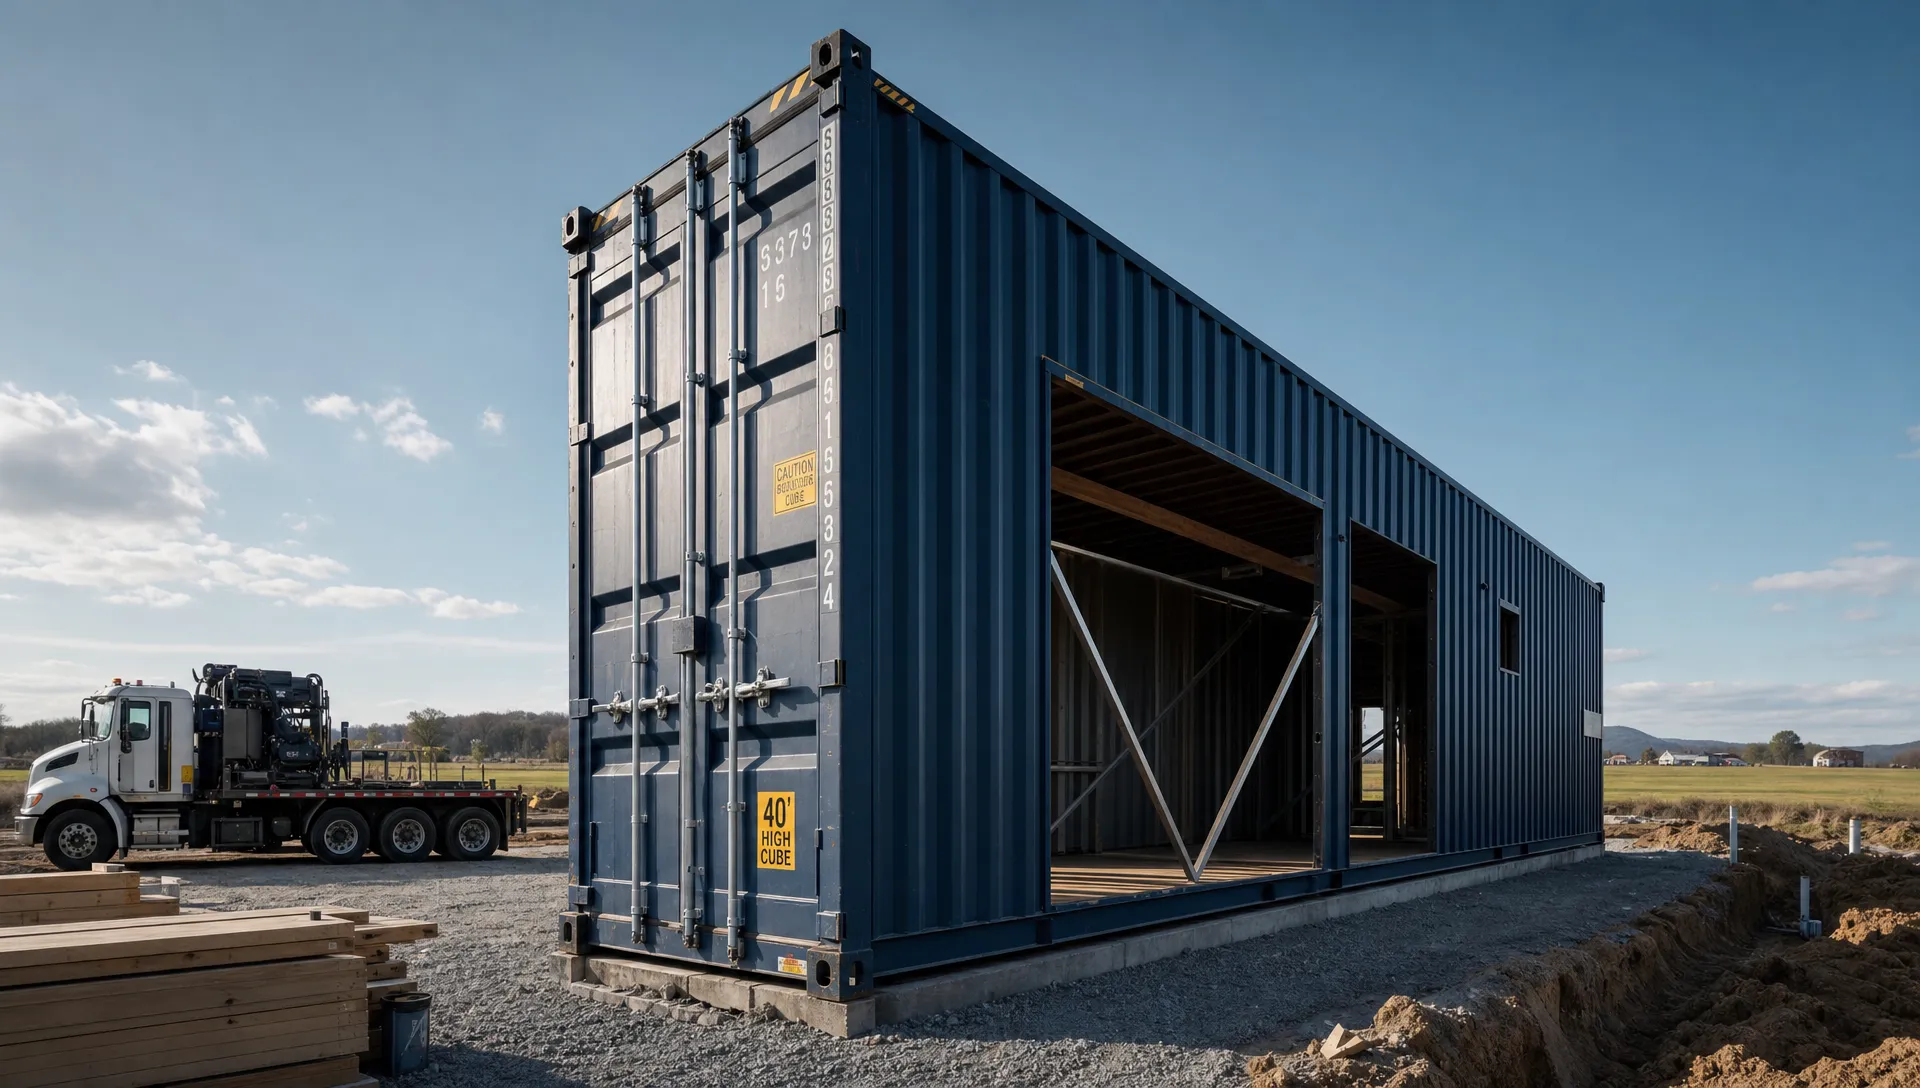
Shipping Container Custom Build: Planning Step by Step
A shipping container custom build is planned by working backward from its final use, not by picking a random cargo container and cutting holes in it. Start with the use case, code requirements, site access, and utility needs. Then choose the container size and condition, create drawings, price each modification, prepare the foundation, and schedule delivery with a supplier who can verify the unit and logistics.
Quick Answer: A custom shipping container build should be planned in this order: define the use, choose the shell, confirm zoning and code requirements, create drawings, price the modification scope, prepare the site, schedule delivery, and inspect the finished unit before final payment.
Key Takeaways
- Plan the code path first. A container home, office, pool house, farm shop, and storage unit may all face different local rules.
- Choose the shell based on the finished build. A 40 ft high cube often works better for living space because it allows more room for insulation and ceiling height.
- Do not cut first and engineer later. Large wall openings, stacking, roof decks, and sidewall removals need structural review.
- Delivery access matters as much as design. A perfect build can stall if the road, gate, slope, or pad cannot handle the truck.
- Use written scopes and inspection points. Clear drawings, change orders, and handoff checks help prevent cost creep and disputes.
Step 1: Define the purpose and non-negotiables
A custom container starts with a plain question: what does this unit need to do every day? The answer changes the shell, layout, insulation, doors, windows, utilities, foundation, and delivery method.
A backyard storage container has a different plan than a container office. A short-term rental cabin has a different plan than a farm workshop. A shipping container home needs more attention to insulation, egress, plumbing, electrical systems, ventilation, and local building codes.
Write the use case in one sentence before you talk about steel, finishes, or colors. For example, a strong planning statement might be: 40 ft high cube backyard office with bathroom, mini-split HVAC, two windows, one personnel door, and delivery to a rural gravel pad.
Then list the non-negotiables. Keep this list short. Too many must-haves can turn a practical container conversion into an expensive custom structure.
Good non-negotiables include:
- Finished use, such as office, cabin, retail unit, workshop, storage, or living space
- Occupancy needs, such as one person, a crew of six, or nightly guests
- Utility needs, such as power only, full plumbing, septic tie-in, or off-grid systems
- Site limits, such as narrow driveway, steep grade, snow load, coastal exposure, or remote delivery
- Security needs, such as lock boxes, roll-up doors, barred windows, or reinforced entries
This is also the point where you decide if custom work is truly needed. Some buyers only need a standard wind and watertight container with a lock box. Others need basic modifications, such as vents, a man door, and shelving. A full bespoke build makes more sense when the layout, finish level, code path, or business use cannot be solved with a standard unit. If you are still deciding, this guide on when a bespoke container build makes sense can help you compare standard, modified, and fully custom options.
Step 2: Choose container size, condition, and starting shell
Most custom builds begin with an ISO container, also called an intermodal container, cargo container, shipping container, or conex box. The basic width is about 8 feet. Standard height is about 8 feet 6 inches. High cube units are about 9 feet 6 inches tall.
That extra foot matters. Once you add floor build-up, insulation, wiring, lighting, and ceiling finish, a standard-height container can feel tight. For homes, offices, studios, and retail units, a high cube often gives a better finished space.
The exact tare weight, payload capacity, and maximum gross weight are listed on the container data plate, often called the CSC plate. For dimension standards, the ISO publishes the Series 1 freight container dimensions under ISO 668. Always verify the actual unit before fabrication, especially if tight clearances matter.
| Starting container | Typical exterior size | Best use cases | Planning notes |
|---|---|---|---|
| 10 ft standard | 10 ft x 8 ft x 8 ft 6 in. | Small storage, guard booth, compact tool room | Limited space, easy placement, availability varies by market |
| 20 ft standard | 20 ft x 8 ft x 8 ft 6 in. | Storage, small office, pop-up retail, equipment room | Easier delivery than 40 ft, but layout options are tighter |
| 40 ft standard | 40 ft x 8 ft x 8 ft 6 in. | Workshops, storage, basic cabins, job-site use | More floor area, still watch finished ceiling height |
| 40 ft high cube | 40 ft x 8 ft x 9 ft 6 in. | Tiny homes, offices, studios, Airbnb cabins | Best common shell when insulation and comfort matter |
| 45 ft high cube | 45 ft x 8 ft x 9 ft 6 in. | Larger modular builds, commercial layouts | Confirm availability, delivery access, and local transport limits |
Container condition also matters. A one-trip container is usually the cleanest starting point because it has made one cargo trip after manufacture. It often has better paint, straighter panels, and less wear.
A cargo-worthy, or CWO, container is inspected for cargo use. A wind and watertight, or WWT, container should keep out wind and rain, but it may have more dents, patches, or cosmetic wear. Used and refurbished units can be a smart choice for storage, workshops, and budget-sensitive projects. For living space or design-heavy projects, many buyers prefer one-trip or carefully refurbished shells.
Do not judge only by photos. Check door operation, roof condition, floor condition, corner posts, bottom rails, and prior repairs. If the project involves plumbing, bedrooms, food service, or guests, ask more questions about previous cargo history and floor treatment.
Step 3: Confirm zoning, code path, engineering, and permits
Permits are not a detail to handle later. They can decide whether your project is possible at all. Requirements vary by state, county, city, zoning district, flood zone, fire zone, and HOA.
Call the local building department before you order a custom build. Ask how they classify the project. Is it an accessory structure, dwelling, modular unit, temporary job-site office, commercial building, agricultural structure, or storage unit? Each category may trigger different rules.
For residential builds, start with land use and occupancy. A shipping container home may need to meet local residential code, energy code, electrical code, plumbing code, septic rules, setback rules, and foundation requirements. The International Code Council publishes widely used model codes through the I-Codes, but local authorities decide what applies in your area.
For commercial builds, ask about ADA access, restrooms, emergency exits, fire separation, signage, parking, and occupancy limits. For job-site offices, ask whether the unit is considered temporary and how long it can remain on-site.
Engineering is another early checkpoint. Containers are strong at the corners and frame, but cutting large openings can change how loads move through the steel. Wide glass doors, long window runs, sidewall removals, stacked units, roof decks, and heavy rooftop equipment often need engineered reinforcement.
Do not assume a container can carry any load just because it was built for cargo. Cargo loads are different from building loads. Snow, wind uplift, seismic forces, people on a roof deck, and foundation settlement all affect the finished structure.
If you are planning a residence, review the zoning and buying process before you commit to land or a shell. This article on how to buy a shipping container house the right way covers key early checks like zoning, site conditions, and container selection.
Step 4: Plan your shipping container custom build scope
Once the code path looks workable, turn the idea into a clear scope. A good scope tells the builder what to cut, reinforce, install, finish, test, and deliver. It also helps you compare quotes fairly.
Start with a simple floor plan. Mark doors, windows, bathroom walls, utility runs, cabinets, built-ins, furniture, equipment, and clear walking paths. In an 8 ft wide shell, every inch matters. A hallway that looks fine on paper may feel tight after insulation and interior wall finishes.
Next, plan the cut list. This should show every opening in the container wall, roof, or floor. Each opening needs a purpose and a reinforcement plan. A small window is different from a 12 ft glass slider. A roll-up door in a workshop is different from a residential egress door.
Then plan systems. A storage build may only need vents and a lock box. A workshop may need electrical outlets, lighting, work benches, and a roll-up door. A living unit may need framing, insulation, plumbing, HVAC, water heating, interior finishes, smoke alarms, and code-compliant exits.
| Scope item | What to define | Why it matters |
|---|---|---|
| Layout | Rooms, furniture, workflow, door swings | Prevents cramped spaces and rework |
| Openings | Doors, windows, roll-up doors, vents | Drives structural reinforcement and weatherproofing |
| Insulation | Wall, roof, floor, vapor control | Controls comfort, condensation, and energy use |
| Electrical | Panel, outlets, lighting, exterior power | Affects code review and rough-in sequencing |
| Plumbing | Bathroom, kitchen, water heater, drains | Requires utility plan and local inspection |
| HVAC | Mini-split, ventilation, exhaust fans | Impacts comfort and moisture control |
| Exterior finish | Paint, cladding, roof cover, skirting | Affects durability and appearance |
| Delivery | Tilt-bed, crane, forklift, final orientation | Determines site prep and installation plan |
For occupied builds, insulation deserves special attention. Steel moves heat fast. Without the right insulation and vapor control, the unit can be hot, cold, damp, or prone to condensation. Closed-cell spray foam is common in container homes because it can insulate and help manage moisture, but the right choice depends on climate, code, budget, and interior finish.
Step 5: Price the build, schedule fabrication, and control changes
A bare container price is not the same as a finished custom build price. The final number depends on the shell, steel work, doors, windows, insulation, utilities, interior finishes, foundation, delivery, crane needs, and permit requirements.
Avoid generic internet averages. They often leave out freight, engineering, site work, utility tie-ins, interior finish, and local code items. The safer approach is to request an itemized quote that separates the container, modifications, delivery, and optional upgrades.
Ask for these line items in writing:
- Container size, condition, and certification, such as one-trip, CWO, or WWT
- Exterior modifications, including cuts, frames, doors, windows, vents, and paint
- Structural reinforcement, especially around large openings or stacked sections
- Interior build-out, including framing, insulation, wall finish, flooring, and cabinetry
- Mechanical, electrical, and plumbing scope
- Engineering, drawings, permit support, or inspection support if offered
- Delivery method, distance, equipment needs, and offload assumptions
- Exclusions, such as foundation, utility trenching, septic, local fees, or crane rental
Financing can also affect the plan. Outback Shipping Containers offers financing options, but the right payment structure depends on the scope and buyer qualification. Ask what is due at order, fabrication, delivery, and completion. For custom work, also ask how change orders are approved.
Change orders are common when a buyer adds windows, moves doors, upgrades finishes, or changes utility locations after fabrication starts. They are not always bad, but they should be written, priced, and approved before work continues.
A practical schedule has checkpoints. Use one for drawings, one before steel cutting, one after rough openings, one after rough utilities, one before interior finishes, and one before delivery. Photos or video walk-throughs can help if the build is not local.
Mid-project checkpoint: If you have a site, a rough floor plan, and a use case, talk with Outback Shipping Containers about matching the right shell to the scope before fabrication starts. This is the point where expert delivery and container selection can save time.
Step 6: Prepare the site, delivery route, foundation, and utilities
Site prep is where many first-time buyers get surprised. A container is heavy, long, and hard to reposition once delivered. The truck needs room to enter, turn, back up, unload, and leave.
For tilt-bed delivery, a 20 ft container often needs much less straight-line clearance than a 40 ft container. A 40 ft unit may need roughly 100 ft or more of straight clearance, depending on truck type and site conditions. Always confirm clearance with the delivery team because trucks, trailers, slopes, and local access vary.
Check the route from the road to the pad. Look for low branches, overhead wires, tight gates, soft ground, steep grades, culverts, sharp turns, and weak bridges. Remote and rural sites need extra planning because recovery, crane service, or road repair can be costly.
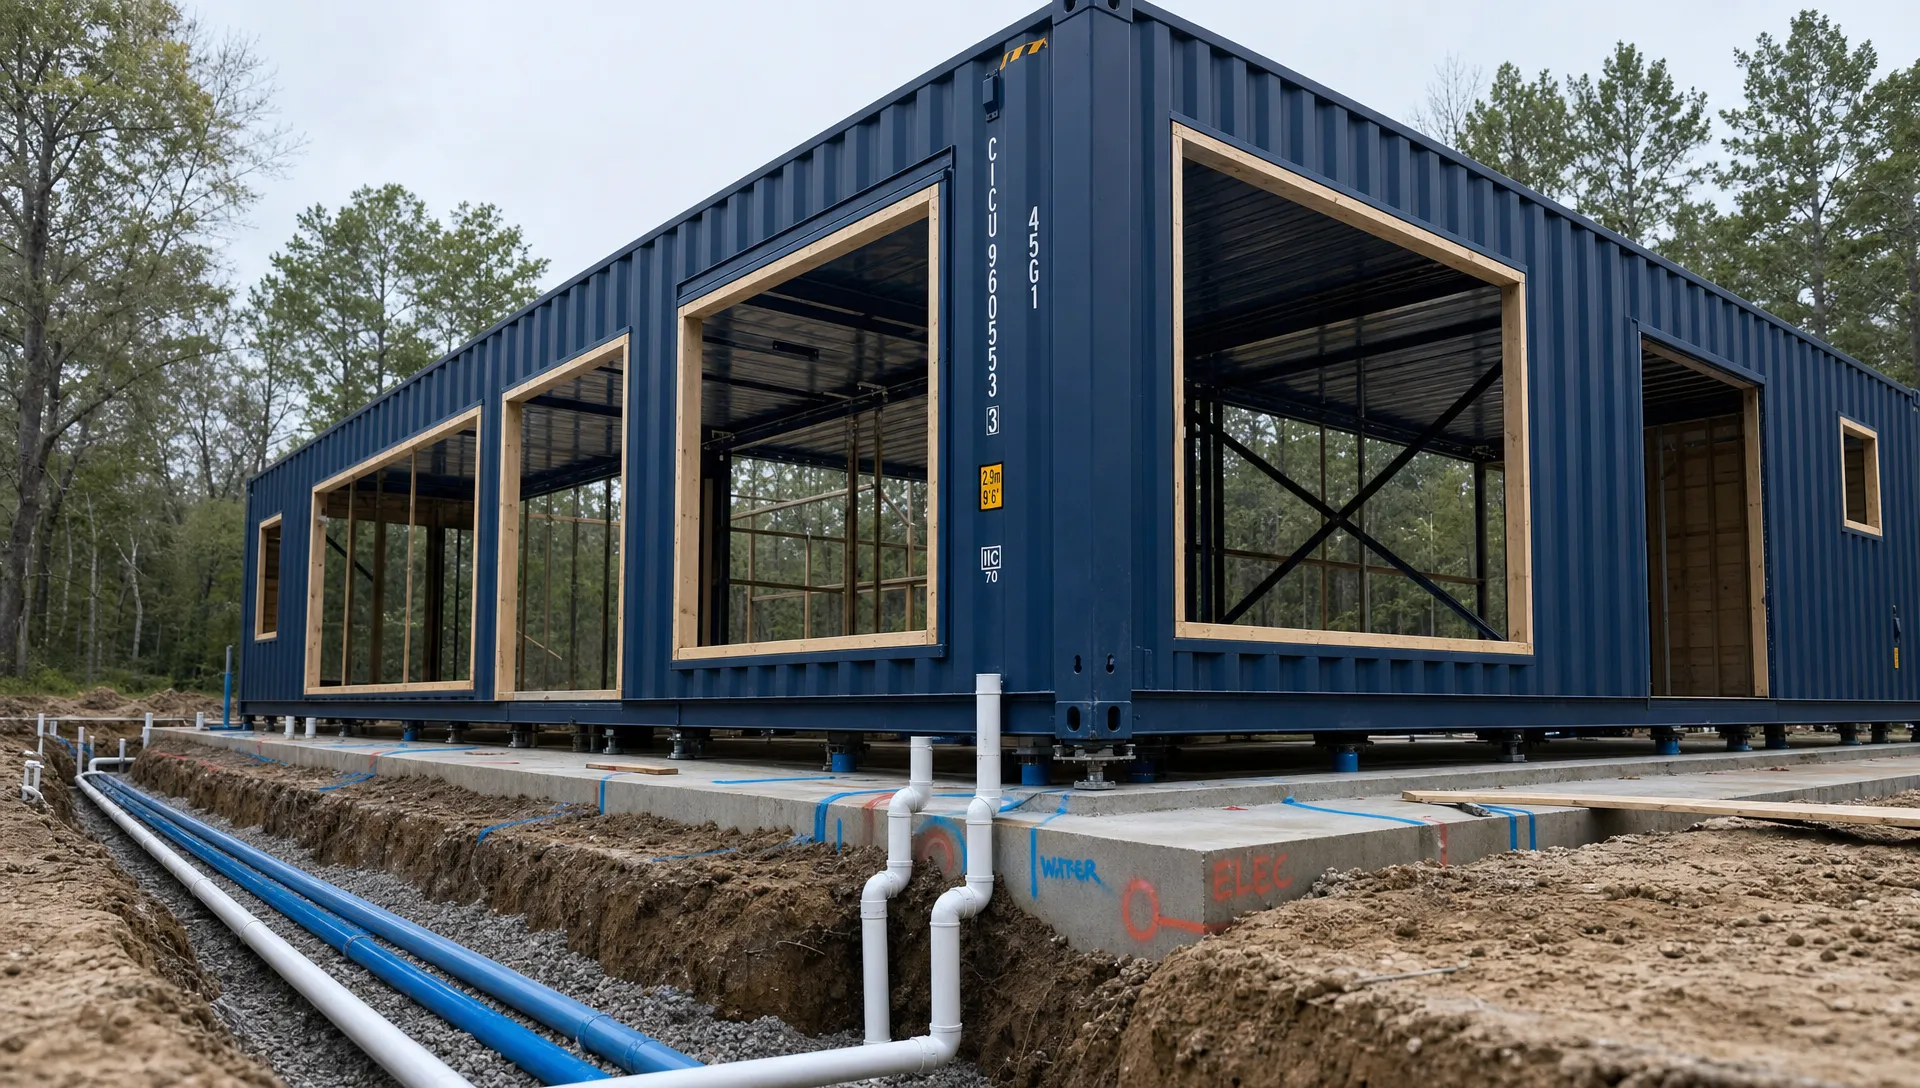
The foundation should keep the container level, dry, and supported. Common options include compacted gravel pads, concrete piers, strip footings, slab foundations, helical piles, and engineered systems. The right choice depends on soil, frost depth, drainage, local code, building use, and whether the unit is temporary or permanent.
Drainage is simple but critical. Keep water away from the container base. Standing water accelerates corrosion and can undermine the pad. A slight grade, compacted stone, geotextile fabric, and proper downspout discharge can all help.
Utility planning should happen before delivery. For homes, offices, and workshops, decide where power, water, sewer, septic, propane, internet, and HVAC condensate will enter or exit. It is much easier to coordinate penetrations, sleeves, and trenching before the unit is set.
If you are not sure where to start, use this shipping container site prep checklist before you schedule delivery. It covers access, foundations, drainage, and installation details that can affect the whole project.
Step 7: Inspect, set, and maintain the finished build
The final inspection should happen before you accept the unit and before final payment if your contract allows it. For a custom build, inspect both the container shell and the modification work.
Start outside. Check paint, roof condition, welds, sealant, door alignment, window flashing, corner posts, bottom rails, and any roof penetrations. Look for dents that hold water, exposed bare steel, loose trim, or gaps around openings.
Then move inside. Test doors, locks, windows, outlets, lights, fans, plumbing fixtures, drains, HVAC, and any built-in equipment. If the build has a bathroom or kitchen, run water long enough to check for leaks. If it has a mini-split, test heating and cooling modes when weather allows.
For permitted projects, do not skip local inspections. You may need inspections for foundation, framing, electrical, plumbing, insulation, mechanical systems, and final occupancy. Requirements vary, so follow the local process.
After delivery, confirm the unit sits level. A container that twists on an uneven base can make doors hard to operate and stress finish materials. If needed, correct the support points before adding decks, stairs, skirting, or utility connections.
Maintenance is simple if you keep up with it. Touch up paint chips. Keep the roof clean. Maintain door gaskets. Watch for standing water. Keep vegetation off the walls. Check sealants around windows and roof penetrations once or twice a year.
A shipping container is a durable steel structure, but a custom build is still a building. Treat it like one, and it will perform better.
Frequently Asked Questions
How much does a custom shipping container build cost?
Cost depends on the container size, condition, delivery distance, steel cuts, reinforcement, insulation, utilities, finishes, foundation, and permit requirements. A bare container price is only one part of the budget. Ask for an itemized quote that separates the shell, modifications, delivery, and exclusions.
Do you need a permit to build with a shipping container?
Usually, yes, if the container is permanent, occupied, connected to utilities, used commercially, or placed in a regulated zoning area. Rules vary by city and county. Always check with the local building department before ordering the container or starting fabrication.
Is it cheaper to build a shipping container home than a traditional house?
It can be, but it is not automatic. The steel shell may save time on structure, but openings, reinforcement, insulation, plumbing, electrical work, HVAC, foundation, and code compliance add cost. The best savings come from simple layouts, fewer custom cuts, and good site planning.
What size container is best for a custom build?
A 20 ft container works well for compact offices, storage, kiosks, and equipment rooms. A 40 ft high cube is often better for homes, studios, and offices because it gives more floor area and extra ceiling height for insulation, lighting, and HVAC.
Can I cut windows and doors into a shipping container?
Yes, but every cut changes the steel structure. Small openings may be simple, while large sliders, roll-up doors, and sidewall removals often need steel tube frames or engineered reinforcement. Plan all openings before fabrication so the structure, weatherproofing, and layout work together.
How long does a container conversion take?
Timing depends on permitting, engineering, container availability, modification scope, finish level, and delivery access. A basic storage or office modification may move faster than a residential build with plumbing and inspections. Plan for design, approvals, fabrication, site prep, delivery, and final utility work.
Ready to plan your custom container build? Outback Shipping Containers supplies new, used, and custom containers nationwide, with inspected units, delivery support, transparent online pricing, and financing options. Start by reviewing your site, code path, and use case, then request help from Outback Shipping Containers to match the right container to the build.