Shipping container barn flooring and drainage options: 5…
By Outback Container Experts · Published October 22, 2026
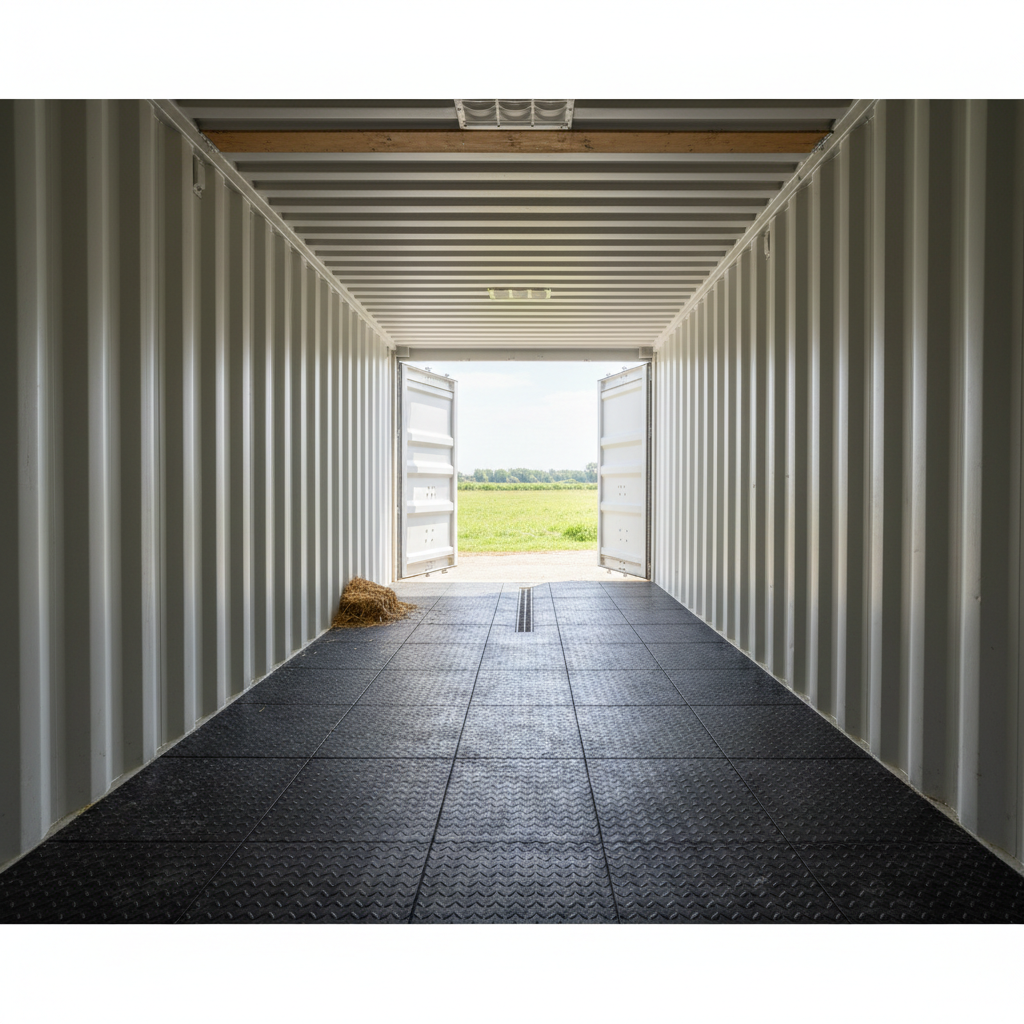
Ranchers and hobby farmers across the United States are increasingly turning to ISO shipping containers as rugged, predator-proof alternatives to traditional timber barns. However, the standard 1.1-inch marine-grade plywood flooring found in most units—while exceptionally strong for cargo—was never designed to handle the acidic nature of livestock urine or the constant moisture of a wash-down stall. Selecting the right shipping container barn flooring and drainage options is the difference between a structure that lasts decades and one that rots from the inside out within three winters.
Table of Contents
- shipping container barn flooring and drainage options: Evaluation Criteria for Container Barn Flooring
- Quick-Pick Summary: Best Flooring & Drainage Systems
- Top Shipping Container Barn Flooring Recommendations
- Essential Features of Container Drainage Systems
- Common Mistakes in Container Barn Modifications
- Budget vs. Premium: Where to Invest
- Setup, Delivery, and Site Prep
- More on Livestock & Stock Combo Trailers
- Container delivery near you
- Optimizing Structural Integrity for Heavy Agricultural Loads
- Climate-Controlled Barns and Reefer Flooring Strategies
- Site Preparation for Barn Flooring Longevity
- Frequently Asked Questions
- Explore Related Products & Guides
shipping container barn flooring and drainage options: Evaluation Criteria for Container Barn Flooring
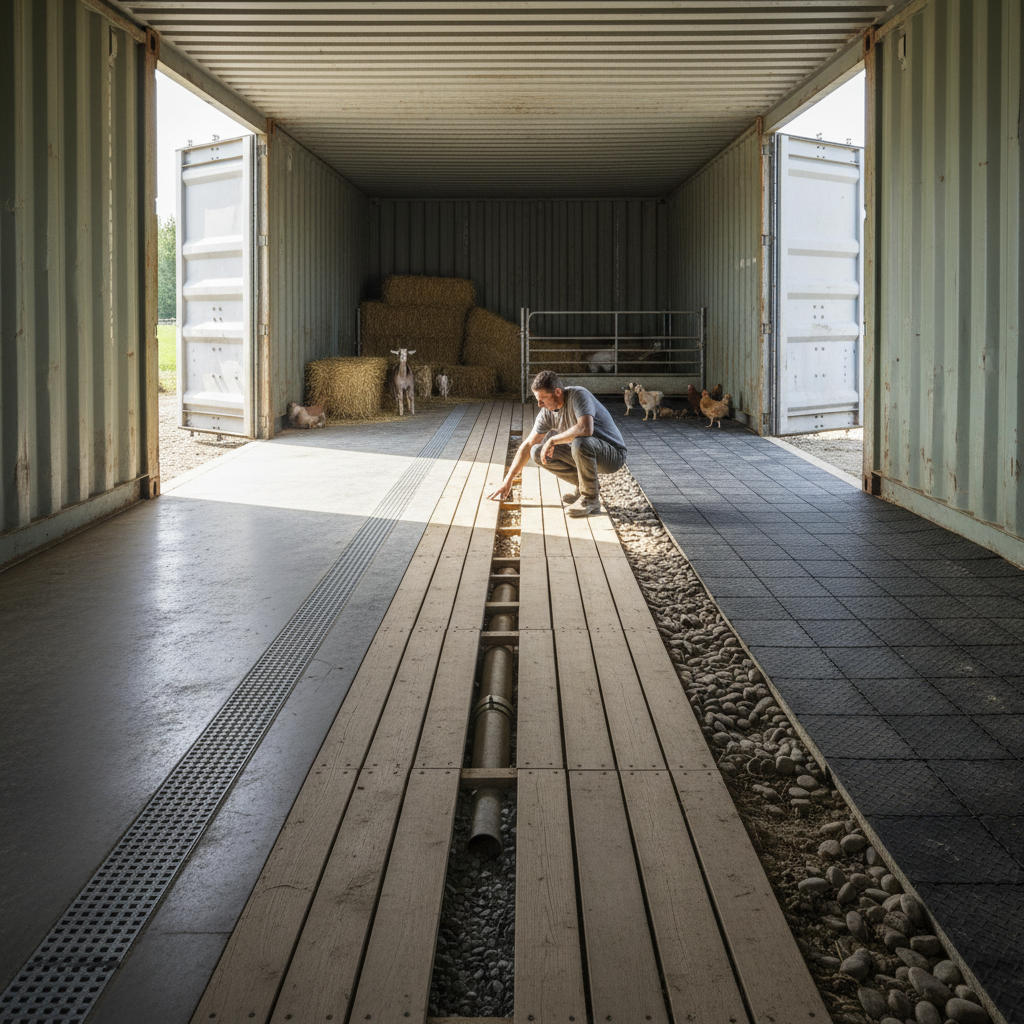
When we test flooring and drainage configurations for a shipping container floor coating, we prioritize three factors: moisture impermeability, slip resistance for animal safety, and corrosion protection for the underlying steel crossmembers. Standard container floors are treated with insecticides (like Radex) to meet international shipping standards, so sealing these floors is also a health requirement for livestock occupancy. We evaluate these options based on their performance in high-humidity agricultural environments in states like Texas and North Carolina.
Quick-Pick Summary: Best Flooring & Drainage Systems
| Solution Type | Best For | Estimated Cost (2026) | Drainage Method |
|---|---|---|---|
| Vulcanized Rubber Mats | Horse Stalls & Cattle | $3.50 - $6.00 / sq ft | Surface runoff to scuppers |
| Polyurea Roll-on Liners | Wash Bays & Sanitation | $8.00 - $12.00 / sq ft | Sloped floor to floor drains |
| Perforated HDPE Tiles | Small Livestock / Goats | $4.50 - $7.50 / sq ft | Sub-floor flow-through |
| Aluminum Tread Plate | Heavy Equipment & Troughs | $15.00 - $22.00 / sq ft | Peripheral guttering |
Top Shipping Container Barn Flooring Recommendations
Best for Heavy Livestock: Outback Summit 40 High-Cube with Rubber Matting
For those housing horses or cattle, the Outback Summit 40 High-Cube offers the necessary vertical clearance (9'6") for ventilation. When outfitted with 3/4-inch vulcanized shipping container floor coating, it provides excellent impact absorption. To ensure longevity, the plywood must be sealed with a marine-grade epoxy before the mats are laid to prevent trapped moisture from rotting the wood.
Best for Wet Environments: Outback Ridge 20 with Polyurea Coating
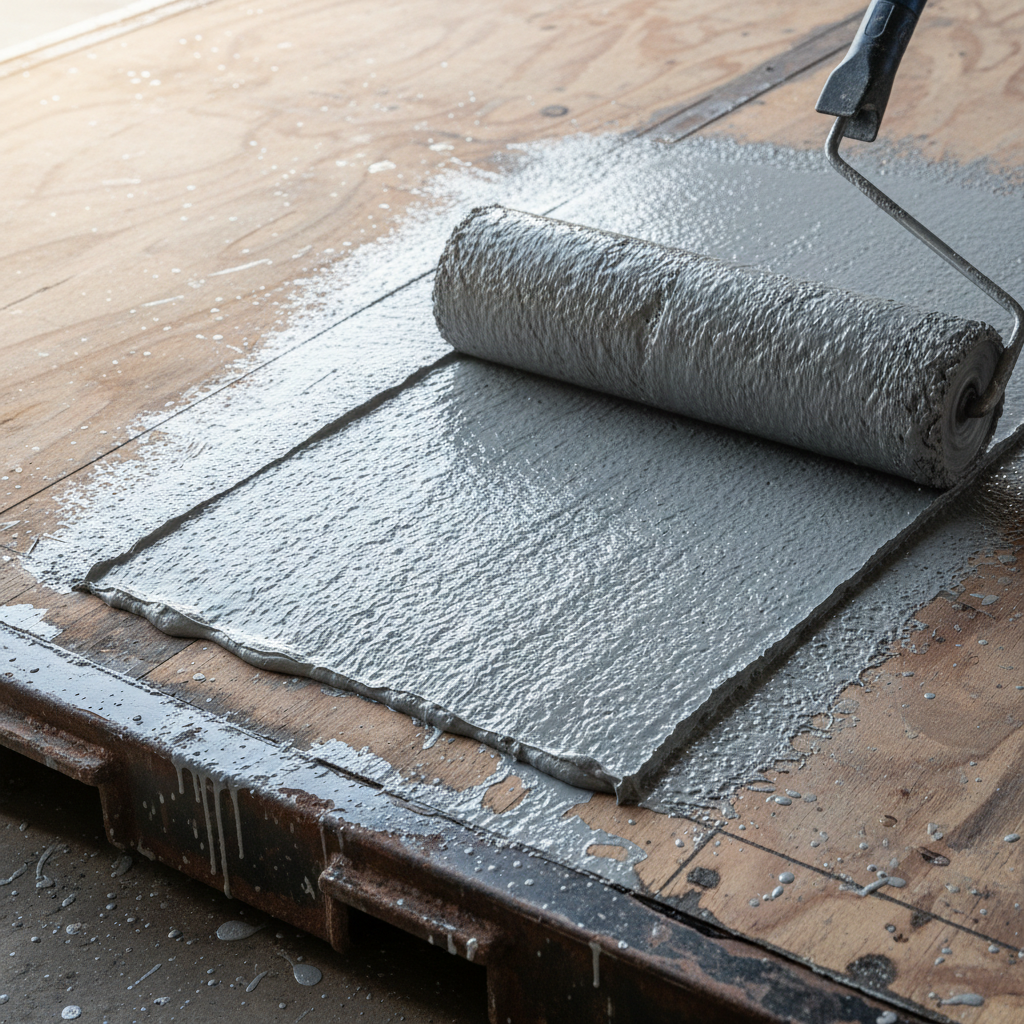
The Outback Ridge 20 is a popular choice for tack rooms or single-animal shelters. For maximum shipping container floor coating, we recommend a professional-grade shipping container floor coating. A polyurea or spray-on bedliner creates a seamless tub that allows for frequent pressure washing without liquid reaching the steel subframe.
Best for Multi-Bay Operations: Outback RanchSpan 40 Twin-Bay
For larger ranching operations, the Outback RanchSpan 40 Twin-Bay Garage System provides a massive footprint. Integrating complex shipping container floor coating here often involves cutting floor penetrations for PVC drains leading to an external septic or leach field. Always ensure penetrations are reinforced with steel collars to maintain structural integrity.
Essential Features of Container Drainage Systems
Drainage in a container barn is non-negotiable. Unlike a traditional barn with a dirt or concrete floor, a container is a sealed steel box. If water enters, it has nowhere to go. Effective systems include:
- Floor Scuppers: Small, screened openings at the corners of the container to allow surface water to escape.
- Internal Pitching: Using a self-leveling compound to create a 1-2% slope toward the doors or a central drain.
- French Drains: Installed externally around the container's shipping container floor coating to prevent water from pooling under the steel chassis.
- External Gutters: Diverting roof runoff away from the door seals to prevent internal flooding.
Important: Never drill drainage holes directly through the floor without sealing the exposed edges of the plywood and steel. Unprotected cuts will lead to rapid delamination of the marine-grade plywood and rust on the floor joists.
Common Mistakes in Container Barn Modifications
One of the most frequent errors is assuming shipping container floor coating are sufficient on their own. Without shipping container floor coating, urine seeps through the seams between mats, creating a toxic, rotting environment beneath the floor. Another mistake is failing to account for the weight of the flooring; thick stall mats can add over 1,000 lbs to a 40ft container, which must be considered if you plan to move the unit later using a gooseneck container chassis.
Budget vs. Premium: Where to Invest
If you are on a tight budget, focus your spending on a New (One-Trip) container rather than a Used one. A new unit's floor is pristine, making it much easier to seal. For the flooring itself, rubber mats are the best budget-friendly option for animal comfort. However, if your budget allows, a full shipping container floor coating system like aluminum checker plate or professional polyurea is the premium choice for a lifetime of service. Consider how this fits into your overall livestock trailer and shelter costs for the year.
Setup, Delivery, and Site Prep
Before we deliver your barn unit, site preparation is critical for drainage. We recommend a gravel pad or concrete piers to keep the steel crossmembers off the wet ground. For a standard 40ft unit, you will need 120 ft of straight approach and 14 ft of overhead clearance (15 ft for High Cube). Visit our shipping policy for full site requirements. If you are building in a remote area, ensure you have a plan for waste management that complies with local shipping container floor coating.
More on Livestock & Stock Combo Trailers
- Aluminum vs Steel Livestock Trailer Weight Guide 2026
- 2026 Gooseneck Container Chassis: Pricing & Sales
- Complete Livestock Trailer Towing Guide
- 2026 Shipping Container Livestock Trailer Costs
Container delivery near you
We deliver to every state in the lower 48 plus Alaska and Hawaii. These local pages list pricing, metro coverage and typical lead times for the areas we run into most:
- Shipping containers near me — how we source from the depot closest to your ZIP code
- Shipping containers in California — pricing and delivery to Los Angeles and San Diego
- Shipping containers in Florida — pricing and delivery to Jacksonville and Miami
- Shipping containers in Georgia — pricing and delivery to Atlanta and Savannah
- Shipping containers Houston — local yard stock and lead times
Optimizing Structural Integrity for Heavy Agricultural Loads
When converting a shipping container into a functional barn or livestock shelter, the focus often shifts immediately to the top layer of flooring, but the underlying structural integrity of the container's steel chassis is what actually bears the weight of your animals and equipment. Standard ISO shipping containers are designed with a heavy-duty C-channel or I-beam subfloor, which supports a 1.1-inch thick marine-grade plywood deck. While these floors are rated for significant weight in a stackable shipping context, a barn environment introduces localized pressure points—such as the hooves of a 1,200-pound horse or the concentrated weight of a loaded tractor—that can cause the plywood to flex or delaminate over time. Before installing any drainage system or top-tier flooring, you must assess the condition of the crossmembers and the plywood surface. At Outback Shipping Containers LLC, every unit is inspected before dispatch to ensure the flooring remains sound and suitable for modification, but heavy agricultural use requires specific reinforcements.
Reinforcement usually involves welding additional steel plating or installing a secondary sub-floor layer. For barn conversions that will house larger livestock, we recommend over-sheathing the existing plywood with a 3/4-inch pressure-treated plywood layer or, better yet, a textured steel diamond plate. This creates a sandwich effect that distributes the downward force of an animal's gait across multiple steel crossmembers rather than stressing a single point in the wood. If you choose to keep the original wood, it is vital to remember that these floors are often treated with pesticides like Radaleum during their original manufacturing for international shipping. While the CSC plate on cargo-worthy units where applicable verifies the container is fit for sea freight, it does not account for the off-gassing that could occur in a closed barn environment. Sealing these floors with a heavy-duty epoxy or a specialized livestock-safe sealant is a non-negotiable first step to ensure both the longevity of the structure and the health of your animals.
Drainage planning must also take the subfloor's geometry into account. Because shipping container floors are flat, they lack the natural pitch required for gravity-based fluid management. In a barn setting, standing urine or water will lead to the rapid corrosion of the steel floor joists and the container side walls. To prevent this, many Houston-area farmers install a sloped screed or a tapered insulation board before laying the final floor. This creates a subtle 1-degree to 2-degree incline that directs fluids toward the container doors or dedicated floor drains. Our team ensures that every unit we deliver is inspected wind- and watertight, providing a clean slate for these critical modifications. Without this internal pitch, moisture will eventually find its way into the seams where the floor meets the wall, leading to structural rot that can be difficult and expensive to repair once the barn is in full operation.
Finally, the choice of drainage outlets will dictate how you maintain the barn's hygiene. Traditional floor drains can be cut into the container's floor, but they must be carefully positioned to avoid the main structural C-channels. Typically, two to three 4-inch diameter drains are sufficient for a 20ft container barn. These drains should be fitted with heavy-duty grates to prevent bedding materials like straw or wood shavings from clogging the pipes. If you are operating a wash stall or a milking station, consider a trench drain system that runs the length of the container. This ensures that high volumes of water are evacuated quickly, keeping the humidity levels low and preventing the growth of mold or bacteria that could compromise the respiratory health of your livestock. Proper drainage is not just about moving water; it is about preserving the steel life-cycle of your Outback shipping container for decades to come.
Important: Always verify that your drainage cuts do not sever primary structural crossmembers. Maintaining the integrity of the steel frame is essential for the long-term stability of the container, especially if you plan to relocate the unit in the future.
- Seal original marine plywood with industrial-grade epoxy to block legacy pesticides.
- Install 1/8-inch steel diamond plate over high-traffic areas for maximum durability.
- Add a 1.5% slope to the floor surface using a leveling compound to ensure fluid runoff.
- Use stainless steel fasteners when securing new flooring to prevent rust streaks.
- Ensure the CSC plate is visible if you intend to maintain the unit's cargo-worthy status for resale.
Climate-Controlled Barns and Reefer Flooring Strategies
For specialty agricultural applications in the United States, such as mushroom farming, vertical hydroponics, or high-value livestock recovery suites, a standard dry van container may not provide the necessary thermal regulation. This is where refrigerated (reefer) containers become the superior choice for a barn conversion. Unlike dry containers, reefers come equipped with an integrated T-grid aluminum floor. This design was originally intended to facilitate airflow beneath palletized cargo, but in a barn context, it provides a built-in drainage and ventilation system that is second to none. The T-grid floor allows fluids to fall through the cracks and into the sub-floor channels, which then lead to the primary drains at the rear of the unit. This makes reefers exceptionally easy to pressure wash and sanitize, which is critical for maintaining a sterile environment in sensitive farming operations.
Operating a reefer barn requires specific electrical considerations that differ from standard residential wiring. Our reefers run on single-phase 220/240V from a dedicated 240V circuit, typically requiring a 50A standard breaker for cooling and heating functions. If you are using the unit as a blast freezer for meat processing or seed storage, a 60A circuit is required to handle the higher surge currents. It is a common misconception that these units require 3-phase power or complex transformers; however, at Outback Shipping Containers LLC, we specialize in units that are compatible with standard U.S. electrical grids. By utilizing a 240V single-phase setup, you can maintain precise temperature and humidity levels within your container barn without the need for expensive phase converters, ensuring your livestock or crops remain in an optimal environment regardless of the external Houston heat.
The insulation properties of a reefer container also impact your flooring choices. Because the walls and floors are injected with high-density polyurethane foam, the thermal bridge between the ground and the interior is effectively broken. This means that in winter, the floor will not be a source of radiant cold, which is a major benefit for young animals or temperature-sensitive plants. However, the aluminum T-grid can be slippery for hooved animals. To remedy this without sacrificing the drainage benefits, we recommend installing interlocking rubber mats with perforated holes. These mats provide the necessary traction for livestock while allowing the reefer's T-grid floor to continue doing its job: facilitating airflow and directing moisture to the drains. This combination creates a high-performance agricultural space that is both comfortable for animals and easy for the operator to maintain.
Maintenance of the reefer flooring system involves clearing the 'drip pan' areas and ensuring the floor drains are not blocked by debris. During our inspection process, we ensure that the refrigeration unit and the floor channels are clear of obstructions. Every unit inspected before dispatch comes with the assurance that the drainage paths are functional. For barn operators, this means less time worrying about standing water and more time focused on production. When the unit arrives, typically via a tilt-bed delivery that requires 100 ft of straight approach for a 20ft unit or 120 ft for a 40ft unit, it is ready for immediate electrical hookup. The combination of stainless steel interior walls and an aluminum T-grid floor makes the reefer the 'gold standard' for high-moisture, high-cleanliness barn applications where a standard dry container might struggle to keep up with the demands of the environment.
| Feature | Standard Dry Container | Reefer Container (Outback Spec) |
|---|---|---|
| Primary Floor Material | 1.1" Marine Plywood | Aluminum T-Grid |
| Drainage Efficiency | Manual (Requires Modification) | Integrated (Built-in Channels) |
| Electrical Requirement | None (Standard Lighting) | 240V Single-Phase (50A/60A) |
| Thermal Insulation | Minimal (Steel Walls) | High (Polyurethane Foam) |
| Best Use Case | Dry Storage / Basic Shelters | Climate Control / Wash Bays |
Tip: If using a reefer for livestock, ensure you have a backup power source. The high insulation levels that keep heat out in summer can also trap heat in if the ventilation system fails while animals are inside.
Site Preparation for Barn Flooring Longevity
The long-term success of your container barn flooring depends heavily on the preparation of the site before the truck arrives. If a container is placed on uneven or soft ground, the steel frame can twist—a phenomenon known as 'racking.' When a container racks, the doors may not close properly, and the floor can develop subtle humps or dips that interfere with your drainage system. To avoid this, we recommend a level pad of compacted crushed stone or a concrete slab. A gravel pad provides excellent secondary drainage beneath the container, preventing moisture from wicking up into the steel chassis. For those in the Houston area or other humid climates, elevating the container just a few inches off the ground using concrete piers or pressure-treated 6x6 timbers is a smart way to ensure air circulation beneath the unit, which protects the sub-floor from premature corrosion.
Delivery logistics are the next critical step. For a standard 20ft container barn, you need to ensure your site has a 100 ft straight approach for our tilt-bed trucks, along with 12 ft of width and 14 ft of overhead clearance. If you have opted for a high-cube container to allow for taller equipment or better ventilation, that overhead clearance requirement increases to 15 ft. A 40ft container requires even more space, needing a 120 ft straight approach and a 45 x 13 ft drop zone. We encourage all our customers to review our full shipping policy at /shipping-policy to ensure their site is ready. If the truck cannot safely maneuver or the ground is too soft to support the weight of the delivery vehicle, it can lead to delays that stall your barn project before the flooring is even installed.
Once the container is set, leveling is the final step in the 'flooring' process. Use a transit level to ensure the unit is perfectly flat, or slightly pitched if you have built your drainage to favor one end. Many barn owners find that a slight 1% slope toward the cargo doors makes cleaning much easier, as they can simply hose out the interior and have the water exit naturally onto a concrete apron. Inspection documentation is included with every purchase, confirming that the structural components needed for this level of stability are in place. By starting with a level, well-drained site, you ensure that the specialized flooring you've invested in—whether it's rubber mats, poured epoxy, or steel plating—remains flat and functional for the entire lifespan of your agricultural building.
Frequently Asked Questions
If you're ready to compare inventory for your project, our team can pull matching units from our nationwide depots to ensure you get the best base for your conversion. Whether you need a 20ft unit for a single stall or a 40ft High Cube for a full barn layout, we provide the inspection documentation you need to buy with confidence. Explore our 40ft High Cube inventory or contact us to discuss custom drainage modifications today.
Explore Related Products & Guides
Frequently Asked Questions
What is the most durable flooring for a container-based horse stall?
High-density polyethylene (HDPE) grid systems filled with crushed stone offer the best durability. These grids prevent the 1.125-inch marine plywood subfloor from shifting under a 1,200-pound horse. To protect against moisture, top the grid with 3/4-inch vulcanized rubber mats. This setup distributes weight evenly across the container’s steel crossmembers, preventing the plywood from bowing or cracking over time under heavy livestock loads.
How do you install a floor slope for drainage in a steel container?
Achieving a 1% to 2% slope requires installing a pressure-treated timber sleeper system over the existing floor. Taper the sleepers from 2 inches down to 0.5 inches toward the door or a custom floor drain. Overlay this with marine-grade plywood and a waterproof membrane. This ensures liquid runoff reaches the drainage exit rather than pooling in the center, which is critical for maintaining hygiene in livestock applications.
What are the benefits of using epoxy coatings in container barns?
Industrial-grade multi-layer epoxy creates a seamless, non-porous barrier that prevents animal waste from reaching the original plywood floor. For barn environments, choose a 100% solids epoxy with an anti-slip aggregate like quartz or sand. A typical 20-foot container requires about 5 gallons for a thick coat. This prevents the absorption of ammonia and bacteria, significantly extending the lifespan of the steel structure and subflooring.
Should you remove the original marine plywood before installing barn floors?
It is generally not recommended to remove the factory-installed 19-ply Keruing plywood unless it is severely rotted. This plywood is structural and rated for over 60,000 pounds of distributed weight. Instead, treat the plywood with a borate-based preservative and install your barn flooring on top. Removing it requires grinding off dozens of recessed self-tapping screws, which weakens the container's integrated floor joist system.
How do you install a French drain system under a container barn?
Preparation begins before the container is set. Dig a trench 12 inches deep and 18 inches wide around the perimeter where the container will sit. Fill with 4 inches of 3/4-inch washed stone and a perforated PVC pipe sloped away from the site. Proper site drainage prevents water from wicking into the floor joists from below, which is the primary cause of floor failure in agricultural conex conversions.
Which flooring option is best for a container-based tack room?
Interlocking PVC tiles are ideal for tack rooms because they provide thermal insulation and moisture resistance for expensive leather gear. These tiles handle the weight of heavy saddle racks and cabinets without indenting. Unlike solid rubber, PVC tiles are lighter and easier to trim around the container's interior corrugations. Expect to pay between $3.00 and $5.00 per square foot for high-quality commercial-grade interlocking tiles.
Can you use concrete slabs inside a shipping container barn?
A lightweight concrete or GFRC (Glass Fiber Reinforced Concrete) pour of 2 inches is possible but adds approximately 5,000 pounds to a 40-foot container. If opting for concrete, you must ensure the container is placed on a level, reinforced gravel pad or concrete piers to prevent the floor from sagging. Use a bonding agent to adhere the concrete to the plywood and include wire mesh to prevent cracking from vibration.
How do you seal the gap between the floor and walls for wash-down?
To allow for frequent pressure washing, install 6-inch stainless steel or heavy-duty plastic cove molding where the floor meets the walls. Use a high-movement polyurethane sealant, such as SikaFlex, to create a watertight bond. This prevents water and cleaning chemicals from seeping into the bottom side rails, which are prone to hidden corrosion if moisture becomes trapped between the steel wall and the flooring.
What is the cost of installing aluminum diamond plate flooring in a container?
Aluminum diamond plate is a premium, rot-proof option for high-traffic barn areas. Materials for a 20-foot container (160 sq ft) typically cost between $1,200 and $1,800 depending on the gauge. Installation involves securing the sheets with stainless steel rivets and sealing seams with cold-welding compound. While expensive, it provides a completely waterproof, fire-resistant surface that can be sanitized daily without degrading the underlying structural floor.
How do you prevent condensation from ruining container barn floors?
Proper ventilation is key to protecting the floor. Install at least two 12x12 inch louvered vents at opposite ends of the container to facilitate cross-flow. Additionally, applying a closed-cell spray foam insulation to the underside of the container prevents the steel floor joists from reaching the dew point. This stops moisture from forming under the plywood, which prevents mold growth and dry rot in humid US climates.
Frequently asked questions
What is the most durable flooring for a container-based horse stall?
High-density polyethylene (HDPE) grid systems filled with crushed stone offer the best durability. These grids prevent the 1.125-inch marine plywood subfloor from shifting under a 1,200-pound horse. To protect against moisture, top the grid with 3/4-inch vulcanized rubber mats. This setup distributes weight evenly across the container’s steel crossmembers, preventing the plywood from bowing or cracking over time under heavy livestock loads.
How do you install a floor slope for drainage in a steel container?
Achieving a 1% to 2% slope requires installing a pressure-treated timber sleeper system over the existing floor. Taper the sleepers from 2 inches down to 0.5 inches toward the door or a custom floor drain. Overlay this with marine-grade plywood and a waterproof membrane. This ensures liquid runoff reaches the drainage exit rather than pooling in the center, which is critical for maintaining hygiene in livestock applications.
What are the benefits of using epoxy coatings in container barns?
Industrial-grade multi-layer epoxy creates a seamless, non-porous barrier that prevents animal waste from reaching the original plywood floor. For barn environments, choose a 100% solids epoxy with an anti-slip aggregate like quartz or sand. A typical 20-foot container requires about 5 gallons for a thick coat. This prevents the absorption of ammonia and bacteria, significantly extending the lifespan of the steel structure and subflooring.
Should you remove the original marine plywood before installing barn floors?
It is generally not recommended to remove the factory-installed 19-ply Keruing plywood unless it is severely rotted. This plywood is structural and rated for over 60,000 pounds of distributed weight. Instead, treat the plywood with a borate-based preservative and install your barn flooring on top. Removing it requires grinding off dozens of recessed self-tapping screws, which weakens the container's integrated floor joist system.
How do you install a French drain system under a container barn?
Preparation begins before the container is set. Dig a trench 12 inches deep and 18 inches wide around the perimeter where the container will sit. Fill with 4 inches of 3/4-inch washed stone and a perforated PVC pipe sloped away from the site. Proper site drainage prevents water from wicking into the floor joists from below, which is the primary cause of floor failure in agricultural conex conversions.
Which flooring option is best for a container-based tack room?
Interlocking PVC tiles are ideal for tack rooms because they provide thermal insulation and moisture resistance for expensive leather gear. These tiles handle the weight of heavy saddle racks and cabinets without indenting. Unlike solid rubber, PVC tiles are lighter and easier to trim around the container's interior corrugations. Expect to pay between $3.00 and $5.00 per square foot for high-quality commercial-grade interlocking tiles.
Can you use concrete slabs inside a shipping container barn?
A lightweight concrete or GFRC (Glass Fiber Reinforced Concrete) pour of 2 inches is possible but adds approximately 5,000 pounds to a 40-foot container. If opting for concrete, you must ensure the container is placed on a level, reinforced gravel pad or concrete piers to prevent the floor from sagging. Use a bonding agent to adhere the concrete to the plywood and include wire mesh to prevent cracking from vibration.
How do you seal the gap between the floor and walls for wash-down?
To allow for frequent pressure washing, install 6-inch stainless steel or heavy-duty plastic cove molding where the floor meets the walls. Use a high-movement polyurethane sealant, such as SikaFlex, to create a watertight bond. This prevents water and cleaning chemicals from seeping into the bottom side rails, which are prone to hidden corrosion if moisture becomes trapped between the steel wall and the flooring.
What is the cost of installing aluminum diamond plate flooring in a container?
Aluminum diamond plate is a premium, rot-proof option for high-traffic barn areas. Materials for a 20-foot container (160 sq ft) typically cost between $1,200 and $1,800 depending on the gauge. Installation involves securing the sheets with stainless steel rivets and sealing seams with cold-welding compound. While expensive, it provides a completely waterproof, fire-resistant surface that can be sanitized daily without degrading the underlying structural floor.
How do you prevent condensation from ruining container barn floors?
Proper ventilation is key to protecting the floor. Install at least two 12x12 inch louvered vents at opposite ends of the container to facilitate cross-flow. Additionally, applying a closed-cell spray foam insulation to the underside of the container prevents the steel floor joists from reaching the dew point. This stops moisture from forming under the plywood, which prevents mold growth and dry rot in humid US climates.
About Outback Container Experts
This guide was prepared by the Outback Shipping Containers team, based on the questions our customers ask us most when buying, modifying and taking delivery of shipping containers. Learn more about us.
Ready to find your container?
Browse our in-stock shipping containers, container homes and custom builds, or ask our team for a free quote with delivery to your site.